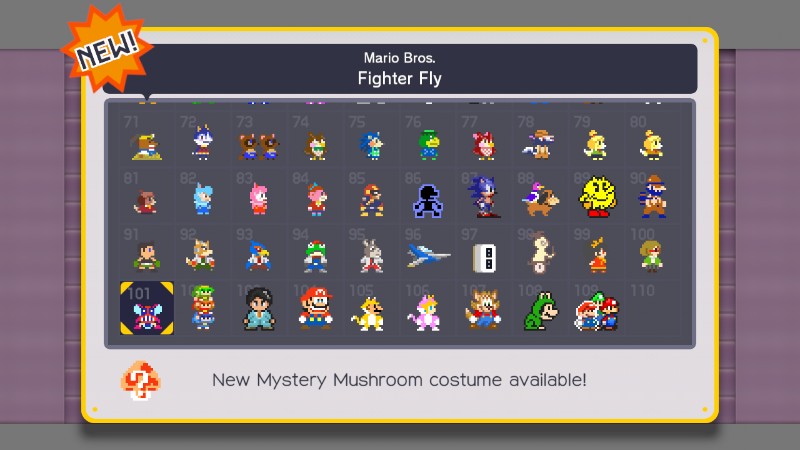
After an update to Super Mario Maker in November 2015, there is now a Hard version of the mini-game Gnat Attack. This mode is incredibly difficult but those who manage to beat it will earn Mystery Mushroom Costume 101: Fighter Fly. In fact, it is so tough that not many people seem to have beaten it. As such, I couldn't really find any guides online or many videos of people doing it. After beating the game myself, I wanted to share what I felt helped me and hopefully it will help some of you out there too.
[To play Hard Mode Gnat Attack, go to Create Mode and select a Muncher, then shake it. Shaking repeatedly will create a puff of smoke. After about 3 or 4 puffs of smoke, several Gnats will appear and after about 6 or 7 puffs of smoke, Watinga will appear. Hit Watinga until the game begins]
GENERAL INFO
As with the previous Gnat Attack game, there are 3 Levels, each with a 30 second time limit and each more difficult than the last, with the third and final one being a Boss Level. Level 1 and Level 2 have 3 waves of enemies, with each wave appearing after the previous one is defeated. To succeed you must beat all 3 Levels in one go. If you don't succeed in beating any of the levels, you must start from Level 1 again. There are two techniques you must master:
- Accuracy - The ability to swat enemies with one tap, rather than hitting repeatedly in their general area. Being accurate will save you energy and time and is necessary when the screen is flooded with enemies. Particularly important for Level 1 and Level 2 but also important in parts of Level 3 as well.
- Speed - The ability to tap the screen in succession very, very quickly. Vital in Level 3.
Your tactics and strategy may vary depending on your skill level with each of these techniques. For me, I was great with accuracy but my speed needed work and was the main thing holding me back. Here are the enemies you will face:
- Big Fly - A standard enemy that appears in Level 1 and Level 2. They are low priority enemies, as not hitting them right away is not penalised in any way. Requires Accuracy.
- Bomb Fly - After zig-zagging for a few seconds, these black bombs with wings will stop moving, flash red a few times and then explode. Each explosion removes 1 second from the timer. They are quite high priority and appear in all 3 Levels. Requires Accuracy.
- Dragonfly - These yellow enemies move in straight lines, either horizontally from the sides of the screen or vertically from the top and bottom of the screen. They stop after a few seconds, their eyes flash red and will release Gnats if they are not swatted. These are very high priority and appear only in Level 2. Requires Accuracy.
- Gnats - These are very small flies that can be annoying to hit. They are produced by the Dragonfly in Level 2 and by Watinga #01 and Watinga #02 in Level 3. Their priority in Level 2 is very low but in Level 3 they are a special case (see later). Requires Accuracy and Speed.
- Watinga #01 (The Grey Watinga) - The first giant robotic insect boss of Level 3. At first it moves fairly slowly and predictably. After a little while, it will stop, release Gnats and then fly upwards off the screen. It only reappears once ALL of the Gnats it released are defeated. After you hit it a lot, it will turn red, after which it will move much faster and more unpredictably. After more swatting, it will explode. The highest priority. Requires phenomenal Speed.
- Watinga #02 (The Red Watinga) - The second giant robotic insect boss in Level 3. After the first Watinga moves off-screen, this one will soon appear. It moves very quickly and more unpredictably. It has less health than the Grey Watinga, taking less time and fewer hits to defeat. After a little while it will stop, release some Gnats and fly upwards off the screen. It only reappears once ALL of the Gnats it released are defeated. After some swatting, it will explode. The highest priority. Requires phenomenal Speed.
My general hints and advice:
- PRACTICE DOES MAKE PERFECT - Keep playing, you WILL get better. Maybe sometimes you will slip backwards briefly but overall progress will be made, you will get better and better and after a while you will be able to see it and realise it for yourself. At first I failed Level 1, then got quite good at it but struggled on Level 2. After a while I could generally do Level 1 and sometimes do Level 2. Then I mostly succeeded at Level 1, got quite good at Level 2 and was terrible at Level 3. Then I would always do Level 1, was great at Level 2 and making progress with Level 3; and finally I would always do Level 1, almost always do Level 2 and was getting better and better at Level 3 until the time when I finally did it.
- PATIENCE - It will probably take a lot of attempts to do this, minutes turn into hours and hours could turn into days. As I said, if you keep playing it, you WILL get more consistent and you WILL get better.
- COMFORT - Find whatever is comfortable for you. Maybe you need to hold the Wii U gamepad downwards or hold it vertically. Perhaps you need to balance it on your thighs or your knees. Maybe you need to get another type of stylus that fits your hand better or hold the stylus in a certain way. Find what works for you and make sure you don't hurt your neck or strain any parts of your body, this game gets very intense. My arm still hurts a lot from playing the game quite intensely during a 24 hour period.
- RHYTHM - As you play more, you will get into a rhythm and unconsciously become aware of just how many of what type of enemy is left and get into patterns. Find your rhythm, which is easier once you get comfortable.
- BREAKS - Take plenty of breaks, short ones between attempts, long ones between Gnat Attack sessions and even mini ones between Levels. Drink water, rest your eyes, let your brain digest what it just did, absorbing the good from your previous attempt and filtering out the bad and make sure your arms and fingers don't get too tired or begin to ache. If you're starting to feel it physically or feel frustrated, walk away for a while. It's okay to take breaks, remember: so long as you're patient, you WILL do this!
- LUCK - Sometimes you need to take responsibility for a failed attempt and admit you just weren't fast enough or you forgot to do something important. However, there is SO much luck required to succeed in this. The places the bad guys appear is random and sometimes they will be more convenient than at other times. Success is where luck meets preparation, so once you are good enough, it's just waiting for the stars to align.
- FUN - Keep the focus on fun. If you are not having fun, don't do this. You have to find the enjoyment in this activity. If you don't succeed, focus on how well you did in that level, on what you did instead of what you didn't do. Remember how far you have come, not how little you have to go.
LEVEL 1
- WAVE 1 - 15 Big Flies
- WAVE 2 - 10 Big Flies and 5 Bomb Flies
- WAVE 3 - 5 Big Flies and 15 Bomb Flies
- PRIORITY: Bomb Flies, then Big Flies
This whole level requires Accuracy. With time, this Level will get very easy and will help you master Accuracy. The first wave is just Big Flies but after that, you want to focus on the Bomb Flies first, the Big Flies can wait until the end of each Wave. At first, you will only just beat this level but eventually you will typically beat it with 3-7 seconds remaining, I even did it with 9 seconds remaining at least once. You might even miss a Bomb Fly or two and still do it.
LEVEL 2
- WAVE 1 - 5 Big Flies and 5 Dragonflies (and Gnats)
- WAVE 2 - 5 Dragonflies and 10 Bomb Flies (and Gnats)
- WAVE 3 - 5 Big Flies, 10 Dragonflies and 10 Bomb Flies (and Gnats)
- PRIORITY: Dragonflies, then Bomb Flies and then Big Flies (and then Gnats)
Though you need to be fast, your Accuracy needs to be brilliant for this Level. This Level will take a long time for you to get good at but it gets easier. You ALWAYS want to swat the Dragonflies first, if you leave them too long, they will produce Gnats that you will need to get rid of to proceed to the next Wave and/or finish the Level. As odd as it sounds, don't worry if a Bomb Fly or two explodes, though you lose a second, the Gnats are very aggravating and will take more than second to get rid of, so always go for the yellow Dragonflies first before they spawn Gnats and get as many Bomb Flies as you can in-between. Luck can affect this level a lot, sometimes more Bomb Flies will be on the screen whilst the Dragonflies aren't and sometimes all the enemies will seem to appear at once. As you improve, you will be able to cope with a spawning of Gnats but more than that will get tricky and most often be your downfall.
LEVEL 3
- WAVE 1 - Watinga #01 and Bomb Flies and Gnats
- WAVE 2 - Watinga #02 and Bomb Flies and Gnats
- WAVE 3 - Watinga #01 and Bomb Flies and Gnats
- PRIORITY: Watinga #01, then Watinga #02, then the first 9 Gnats*, then Bomb Flies and then the remaining Gnat* (and then Watinga #01 again)
You need incredible Speed to beat this Level. This Level doesn't really have Waves like the other Levels do. Bomb Flies will repeatedly fly onto the screen, one every second or two, there is an infinite number and they never stop doing this at any point. You start with Watinga #01 and after a short while, it will stop, release Gnats and fly upwards, disappearing off of the top of the screen. After a few seconds Watinga #02 will appear and the process is very much the same, except for the fact that #Watinga #02 (being Red) is much faster but has less health. Watinga #01 will reappear once all of the Gnats it spawned are swatted. To generally sum up the strategy: You want to smash up the Grey Watinga, then defeat the Red Watinga, then destroy the last Gnats from the Grey Watinga so that it reappears, then smash the Grey Watinga until it turns red, then smash it more until it is defeated - all while hitting as many Bomb Flies as you can.
The more in-depth guide: when Watinga #01 appears, try to hit it as much as possible, as soon as possible. The part of the screen it emerges from is random, sometimes your hand will be nearby when it appears - another example of the luck required. Ideally, it's great to hit all the Bomb Flies but you will find that to be pretty much impossible. The thing to do is leave them as long as possible. For a start, when Bomb Flies are moving about, they are easier to miss and you cannot spare a single swat. Secondly, Bomb Flies will stop moving, so it's often best to wait until they turn red and flash, as they are easier to hit at this time. Finally, often you will find the Watinga and a Bomb Fly will intersect or fly near one another, this is the perfect time to hit them. Again, sometimes you will get a lot of intersection and sometimes get hardly any, it's just luck. So don't just hit Bomb Flies when you see them, wait until they are close or flashing red. It's probably not worth going for them if you have to move your hand across the entire screen. You will have to miss a few, as Watinga is the utmost priority. Earlier I mentioned how your skills will affect your strategy, if you are very fast at tapping, you might want to just go after Watinga #01 and Watinga #02 without caring too much about the Bomb Flies. If you are good with accuracy, you might want to hit a few more Bomb Flies to give yourself extra time when tapping like crazy. After about 6 or 7 seconds, Watinga #01 will begin to stop and release 10 Gnats, then it flies off the top of the screen, then after a few more seconds, Watinga #02 appears. I stated this earlier but it is VITAL to your success, so I will repeat it again: when a Watinga goes off-screen, it only returns once all 10 of the Gnats it released are swatted. The ideal trick that you want to master, is that you want to destroy 9 of the Gnats (before Watinga #02 appears and during its appearance, again, hope for intersection) and keep your eye on where the final one is whilst smashing Watinga #02. Once Watinga #02 is defeated/exploding, hit that final Gnat and then start smashing up Watinga #01 again. Due to positioning, there is luck involved in this too, though sometimes I just lost track or couldn't beat 9 of them or whatever. Anyway, whilst waiting for the Red Watinga, you want to try and hit the 9 Gnats and hit any Bomb Flies that are on screen. Once Watinga #02 appears, you absolutely MUST destroy it, there isn't enough time to get it back for another round. You need to tap quickly. If you accidentally destroy all of the Gnats, Watinga #01 will reappear and you will have both on screen at the same time. If this happens, keep hitting Watinga #02, don't switch bosses until Watinga #02 is exploding and hope for the best. Frustratingly, you probably will not defeat Watinga #02 quickly enough to avoid it spawning more Gnats, which are indistinguishable from the Gnats of Watinga #01, so you can very easily lose track of the original remaining Gnats. Remember, you don't need to destroy these new Gnats. To beat the Level, you only need to destroy both of the Watingas, so don't waste your time on Watinga #02's Gnats, you only need to hit Watinga #01's Gnats in order to make it reappear. Once Watinga #02 is blowing up (meaning it is destroyed and defeated), destroy the remaining Watinga #01 Gnats (hopefully only 1 of them that hasn't jumbled itself up amongst the Watinga #02 Gnats) and then lay the smackdown on Watinga #01. You need one final burst of energy and at this point, you want to focus on the Bomb Flies a little less and just pummel Watinga #01 until it turns red and then keep on smashing it until it is destroyed. Once it turns red, you probably don't want to swat any Bomb Flies, it will go down to the final second, so don't ever give up or slow down or try to pace yourself, just go all out!
The most difficult thing I found about Level 3 was having to constantly switch gears - going between lots of Speed whenever hitting a Watinga, then Accuracy to take out the Bomb Flies and then back to Speed again - and doing that every few seconds. I found in this Level when I hit Bomb Flies I was generally sloppy and it took a lot of practice to be tapping as quickly as possible but then be precise for a brief moment before returning to ferocious tapping. Again, practice and patience will make you better whilst luck will help how much you need to utilise this skill.
POTENTIAL EXTRA TRICKS
Two techniques I want to briefly talk about that didn't work for me but may or may not work for you:
- HOME Button Pausing - Some people will use the HOME button so that they can get a few very fast hits, then pause, then get a few hits and do this so that they can be precise because they can see where the enemy will be upon un-pausing. I have sort of tried this on this game and in others and never found it helpful (and feared accidentally closing the software at the wrong moment). The other reason I don't do it is because it is not fun. My knuckles, wrist and entire arm hurts like hell right now, but last night I felt thrilled when I finally beat all 3 Levels and I feel proud knowing that I did it legitimately as well.
- Using 2 Styluses - On Mario Party 4, I was able to get a ridiculous high score on the mini-game Domination (a button mashing game) by double tapping the A button using both of my thumbs instead of just one. With each thumb I tapped slower than usual but combined it was epic. Sadly, I didn't find the same for using a second Stylus. Maybe I was tapping too quickly or too imprecisely but for me this didn't work, but try it for yourself if after a long period of time you really feel like you are not getting close.
CONCLUSION
In conclusion, Accuracy is required in Level 1 and Level 2, then use sheer Speed in Level 3. Focus on Black first in Level 1, Yellow first in Level 2 and Watinga in Level 3, whilst keeping an eye on those little Gnats.
That's it! I hope this has helped you in some way, I wish you the absolute best of luck! At the very least, when you succeed, Tweet me at @BeauVO to let me know and a massive congratulations to you when you see this for yourself:
What an absolute relief!